


Loaded Sugar-Free Rocky Road

A few weeks ago Bulletproof asked me to make a Rocky Road for them and I cringed big time. I secretly really hate marshmallows because they practically taste like pure fluffy sugar (which is gross!) and my last attempt at making sugar free marshmallow with liquid stevia resembled styrofoam, it was an epic fail 😂. BUT after a few recipe tests (4 to be exact), I finally nailed a soft, fluffy, not too sweet, GUT FRIENDLY marshmallow! It took awhile, but it was worth it because it tastes like pure vanilla and I actually like it! It’s so yummy mixed with homemade salted chocolate, jelly cubes and the Bulletproof chocolate fudge cookie dough or choc chip cookie dough bars throughout it. I also added in some toasted nuts for some delicious crunchy texture. I’ll be sharing the Rocky Road recipe I created for Bulletproof soon, so keep an eye on my Instagram for that, but for now you can enjoy my Loaded Sugar-Free Rocky Road 😁
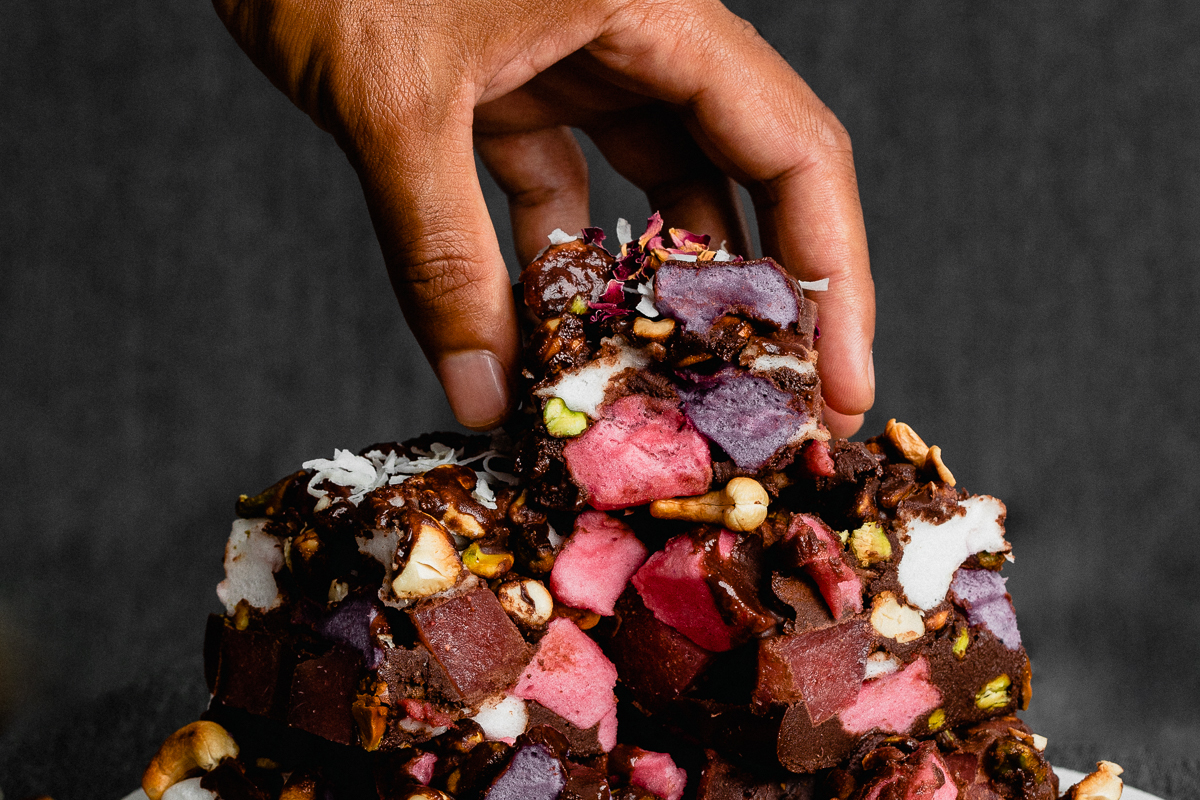
This is my version of a healthy, sugar-free, gut friendly rocky road. While this is a lengthy recipe to put together because there are so many different individual components that need time to ‘set’, but each component is pretty quick and easy to make on their own. The marshmallows may seem a little tricky at first, but trust me, once you make them, the second time will be an absolute breeze. I have made them 6x now (you know I just had to check they worked!) and each time i feel like it get’s easier/ faster to make them.
Loaded Sugar-Free Rocky Road
Strawberry Jelly
(Please note; you don’t have to add this into your rocky road, I just love the texture it provides)
1 cup fresh or fermented strawberries
2 Tbsp of water or the strawberry kefir liquid
1 tsp vanilla
2 Tbsp organic gelatin bloomed in 2 Tbsp water
10-12 drops of liquid stevia
Vanilla Marshmallow
This recipe has been adapted from Quirky Cooking
2.5 Tbsp organic gelatin (use 20ml Tbsp)
1 cup water
1 vanilla bean, scraped
2-3 Tbsp powdered erythritol or natvia - please note you can use honey to taste, however it will change the flavour and the colour so it won’t be white. Liquid stevia does NOT work in this recipe.
Optional Natural Colouring (use the code ‘JORDIEPIE’ to receive 10% off for any of the below ‘hyperlinked’ products)
Pink - 1/8th - 1/4 tsp of dehydrated organic beetroot powder
Green - 1/4 tsp of matcha or 1/8th tsp of spirulina powder
Blue - 1/4 tsp blue spirulina
Purple - 1/8th tsp of blue spirulina and 1/8th tsp of dehydrated organic beetroot powder
Orange - 1/4 tsp turmeric powder
Chocolate - 1-2 tsp cacao powder
Chocolate
1/2 cup cacao powder
3/4 cup cacao butter (measured unmelted)
Pinch salt
1/3 cup (heaped) coconut butter
1/4 cup lakanto (powered) or use stevia, powdered erythritol or honey to taste
Optional Add Ins (for texture)
80g toasted pistachios
100g toasted cashews, almonds, pepitas, sunflower seeds or macadamia nuts (or a mix)
Dried coconut (toasted or fresh)
Chocolate Fudge or Vanilla Cookie Dough Bulletproof Bars, chopped
Strawberry Jelly Method
Blend the fermented or fresh strawberries with the 2 Tbsp of either water or the strawberry kefir liquid until it’s completely lump free.
Add the 2 Tbsp gelatin and mix it together with 2 Tbsp water in a small saucepan. Leave this sit for a minute or two and allow it to ‘bloom’ and thicken.
Once it has bloomed add the 1 cup of water and heat it on low until it’s completely melted and dissolved.
Remove the saucepan from the heat and stir through the strawberry liquid, stevia and vanilla. Taste and adjust as needed.
Pour the jelly liquid into a lined container and place it in the fridge to set.
Marshmallow Method (Thermomix Version)
This method has been adapted from Quirky Cooking
Line 2 containers with unbleached parchment paper.
Add the gelatin into the thermomix bowl with 1/2 cup of the water. Swirl together until combined. Now let it sit for a couple of minutes to absorb the water. Once it has ‘bloomed’ add the remaining water and ingredients (except natural colours), and insert the butterfly whisk. Place steamer basket onto lid instead of MC, so steam can escape.
Cook 6 mins/50C/speed 1. Allow mixture to completely cool down in TM bowl until the temperature light doesn’t light up on the TM (make sure the temp is under 37C)
Now mix for 6-7 mins/speed 4. (Keep butterfly whisk attached, and steamer basket on lid instead of MC.) You’ll know when it’s ready because the mixture should be thick and glossy and look a little like beaten egg whites but still airy. If it doesn’t resemble this, I would recommend you keep mixing for another few minutes, or until it reaches the right consistency.
Transfer 1/2 of the vanilla marshmallow mix to your lined dish and spread it out evenly.
To the other half of the mix, add in your chosen natural colouring. I would recommend the pink one. Start by adding in 1/8th of a tsp of the pink powder and mix the marshmallow again with the butterfly whisk attached on Speed 4 until combined. If you want it ‘pinker’ add a touch more pink powder and mix it through again until it’s evenly combined.
Now transfer the pink marshmallow mix to your second lined dish and spread it out evenly.
Place them both into the fridge to set for at least 1 hour (preferably longer), or until set.
Conventional Marshmallow Method
This method has been adapted from Quirky Cooking
Line 2 containers with unbleached parchment paper.
Place 1/2 a cup of the water into a medium bowl with the gelatin and stir to combine. Set aside to allow the gelatin to absorb the water and ‘bloom’.
In a small saucepan, place your sweetener of choice, salt and the remaining 1/2 cup of water. Heat over medium heat, stirring. Using a candy thermometer, bring the mixture to 115C. It will take about 7-8 minutes to reach this temperature. Remove from heat.
Using a hand mixer or stand mixer on low speed, begin mixing the gelatin and water mixture. Very slowly drizzle the hot syrup into the gelatin mixture, drizzling it down the inside of the bowl.
Once it’s all combined, add the vanilla and increase speed to high. Beat for 12 minutes, or until the mixture is thick and fluffy, and peaks like beaten egg whites when mixer attachment is lifted out. (The main reason marshmallows separate or are very dense is because they haven't had enough air whisked into them - so make sure they're well whisked!)
Transfer 1/2 of the vanilla marshmallow mix to your lined dish and spread it out evenly.
To the other half of the mix, add in your chosen natural colouring. I would recommend the pink one. Start by adding in 1/8th of a tsp of the pink powder and mix the marshmallow again with the butterfly whisk attached on Speed 4 until combined. If you want it ‘pinker’ add a touch more pink powder and mix it through again until it’s evenly combined.
Now transfer the pink marshmallow mix to your second lined dish and spread it out evenly.
Place them both into the fridge to set for at least 1 hour (preferably longer), or until set.
Chocolate Method
Add all the chocolate ingredients to a small saucepan and heat on low until completely melted. Stir through to combine.
Remove from the heat and allow it cool to room temperature.

Assembling the Rocky Road
Remove the set strawberry jelly from the fridge and chop it into small squares.
Remove the pink and vanilla marshmallows from the fridge and use kitchen scissors to chop the marshmallows into squares.
Get your chosen ‘add in’ ingredients ready. For this recipe I chose toasted pistachios and cashews.
Now line a large container with unbleached parchment paper.
Pour 1/4 of the chocolate mixture into this lined container. Begin to evenly add in the jelly, marshmallow, toasted nuts and any other of your chosen ingredients on top of the chocolate. Now pour the remaining chocolate evenly over the top. Don’t worry to much if there is some marshmallow poking out, it will still all hold together once it’s set even if there’s only a little chocolate touching it.
Sprinkle the top with some coconut and place it in the fridge to set.
When it’s ready, slice into squares and enjoy!


“This post does includes some affiliate links. These don’t cost you anymore when you buy them, they enable me to pay for the Real Life of Pie website so I can keep posting free recipes for you. Thank you for your support!”