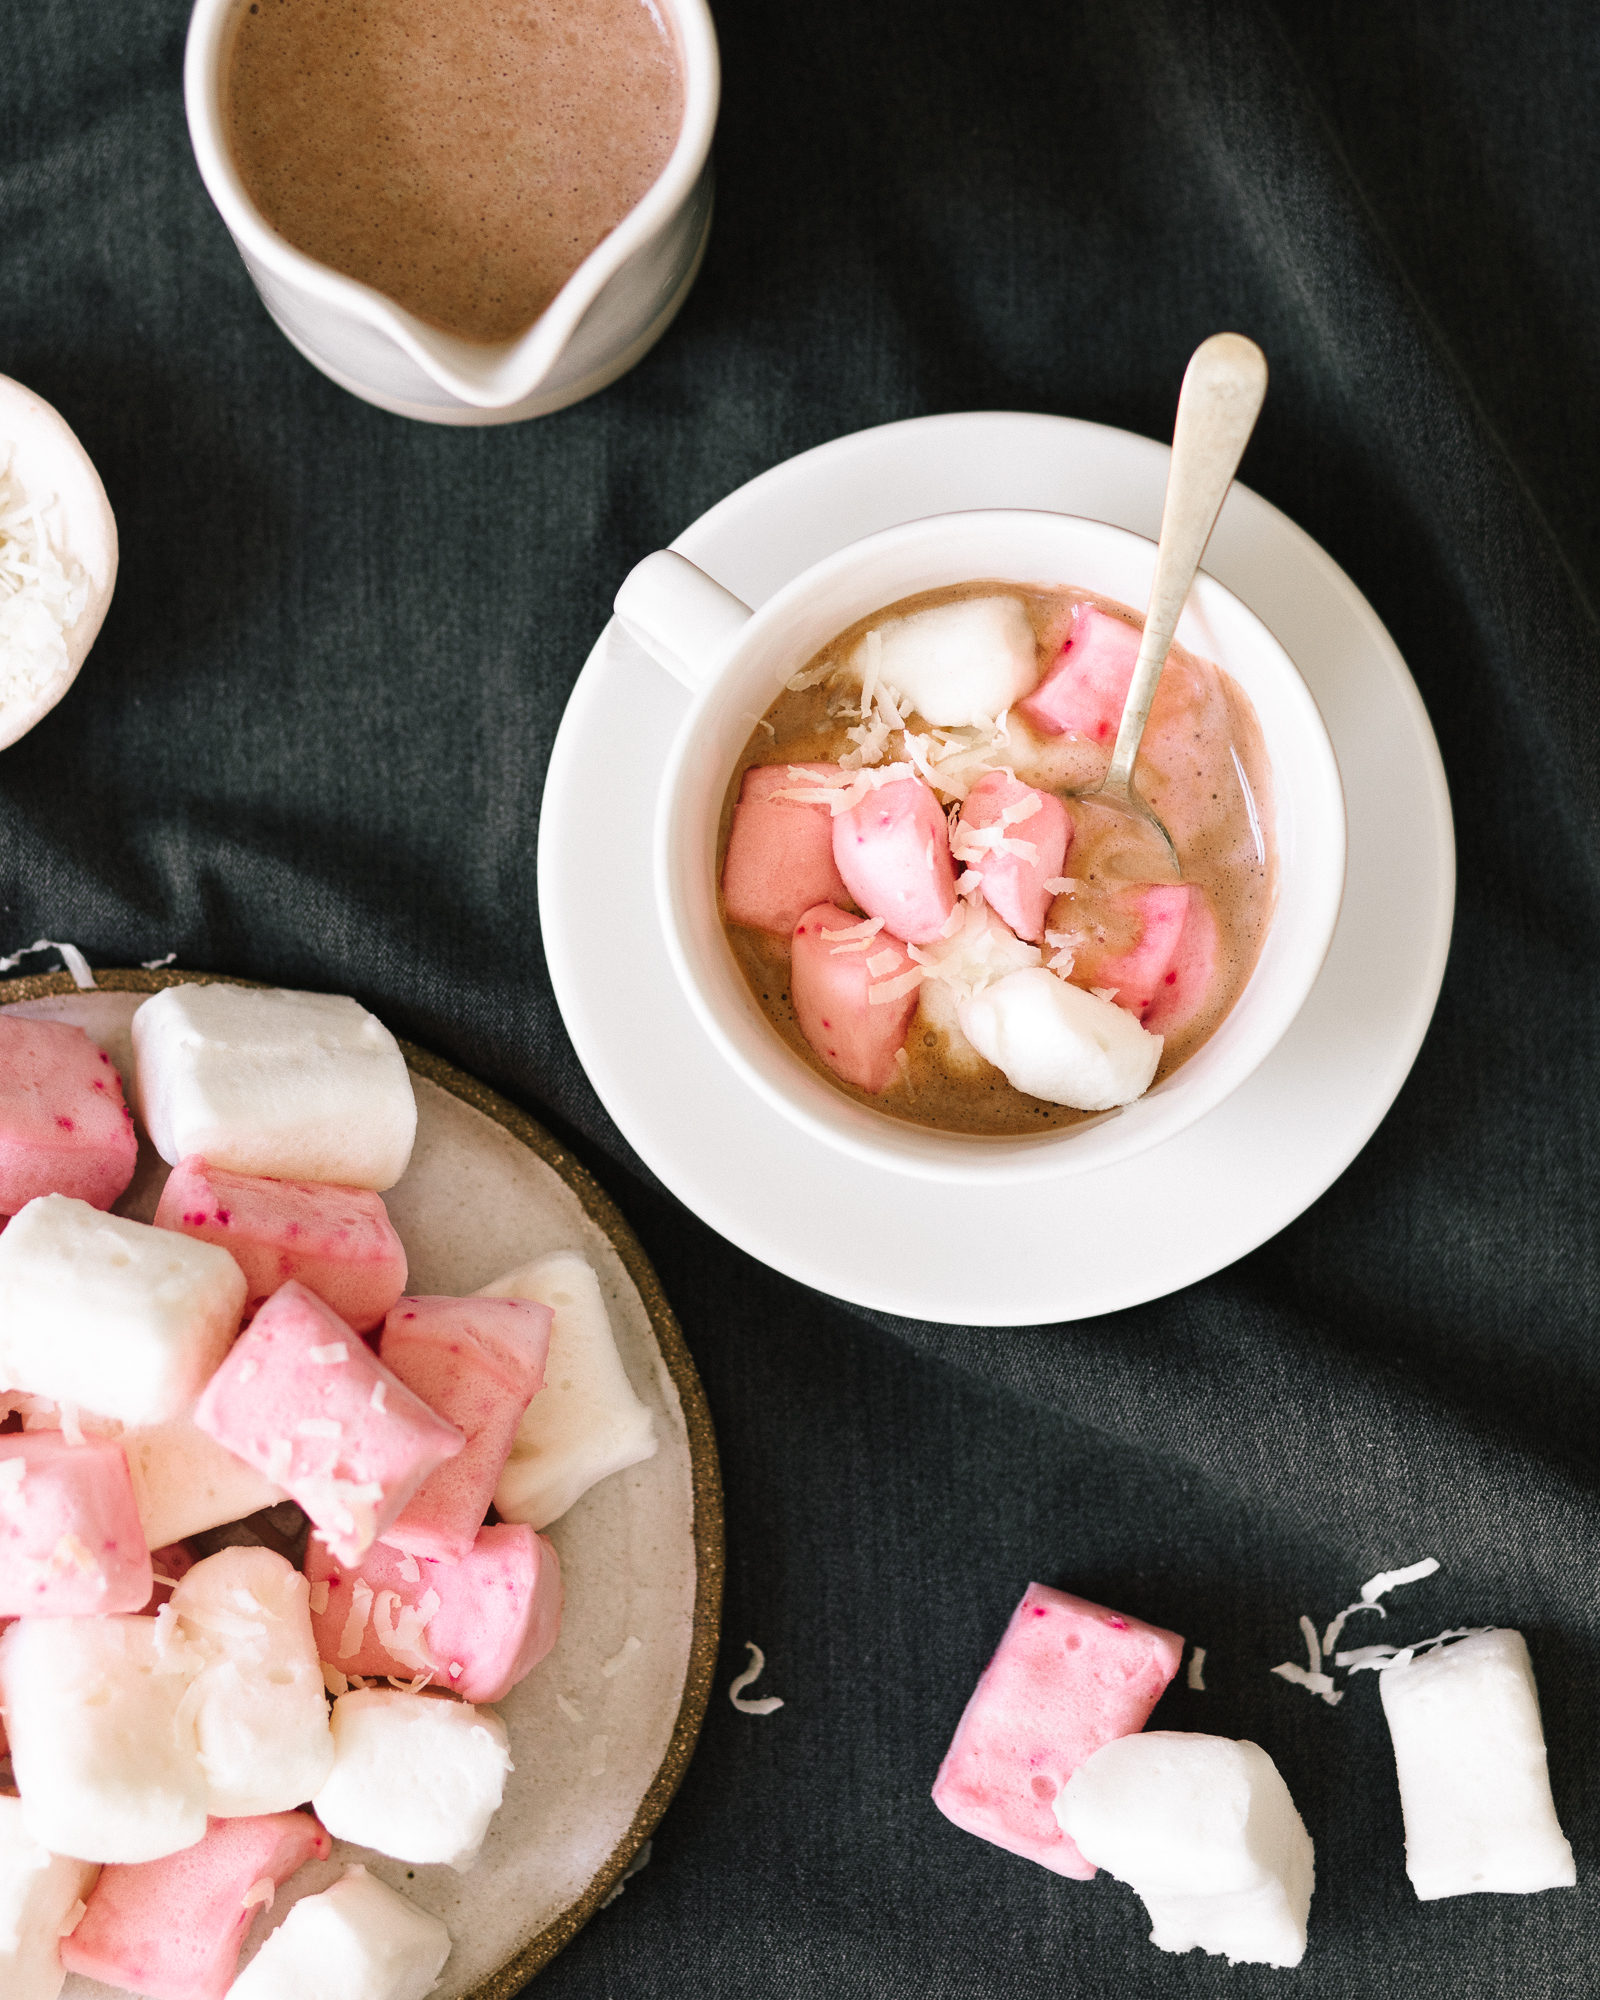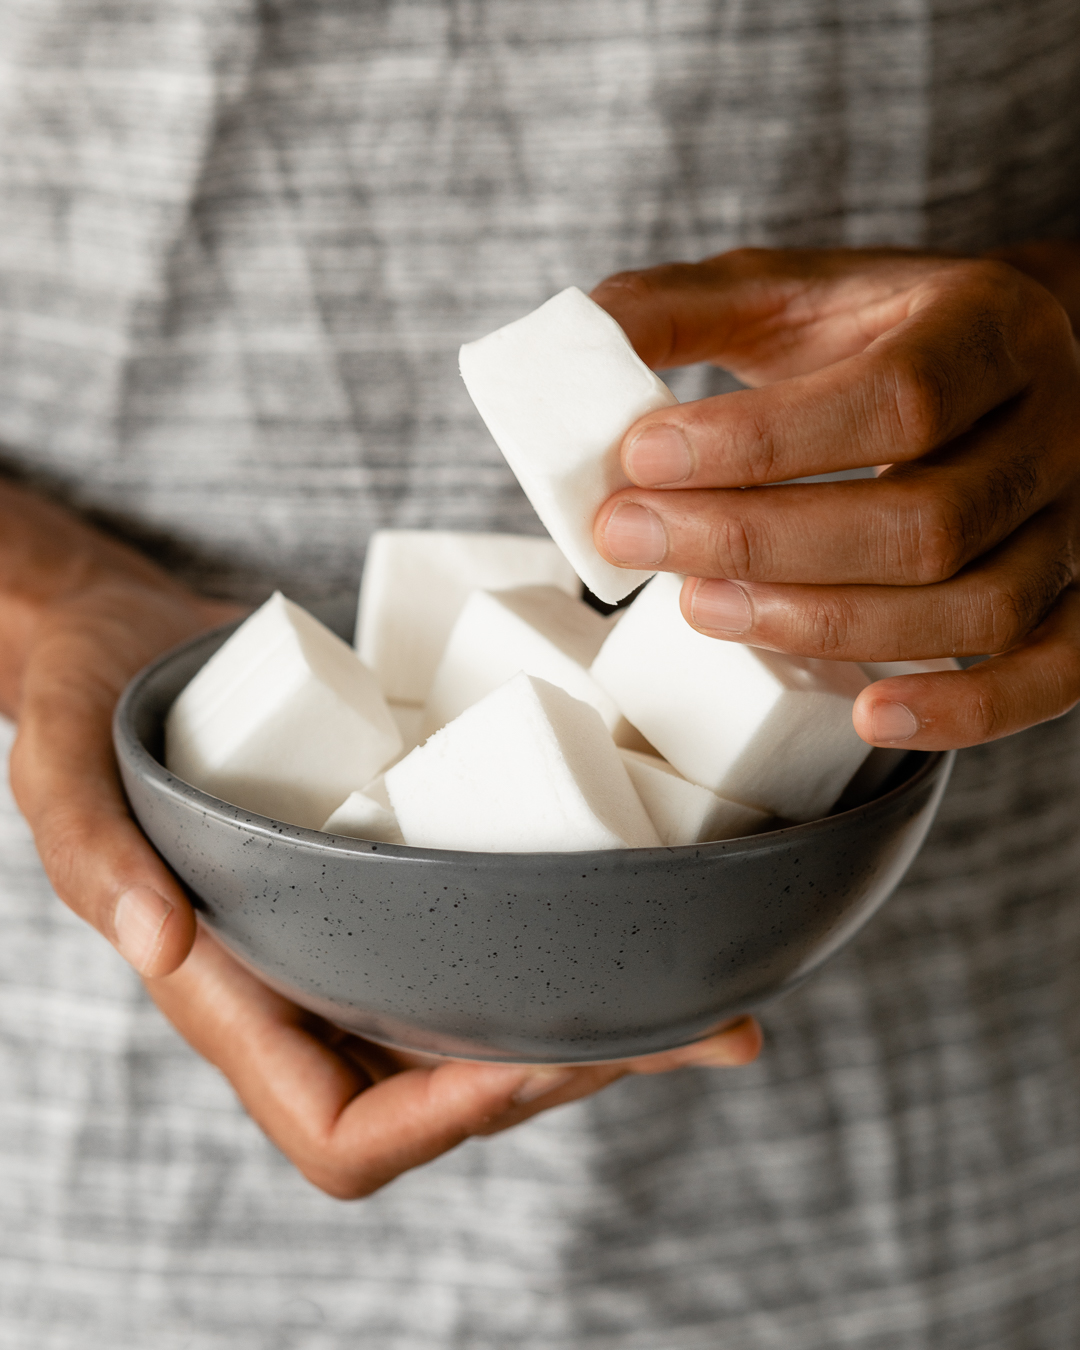


Vanilla Marshmallows (sugar-free)

Introducing my gut friendly marshmallows!!! So why are they gut friendly? Because they’re free from corn syrup and processed sugar + they’re packed with gut lovin gelatin.
WHAT ARE THE HEALTH BENEFITS OF GELATIN?
The amino acids contained help heal damaged cells and build new tissue in the intestinal wall, as well as coating, protecting and soothing the lining of the gut wall. This aids in healing and repairing a leaky gut
Strengthen hair, skin and nails
Can help prevent joint pain
Supports weight management
Promotes cardiovascular health
Supports bone repair
Improves liver function
Shorter recovery is needed after injury or exercise
Improves sleep quality
Highly bio-available protein source
Aids digestion
Aids with hormonal balance
Anti-inflammatory properties
Reduces stretch marks, cellulite and wrinkles
Boosts metabolism
Read more about the health benefits and uses of gelatin HERE
These marshmallows may seem a little tricky at first, but trust me, once you make them, the second time will be an absolute breeze. I have made them 6x now (you know I just had to check they work!) and each time i feel like it get’s easier/ faster to make them.
Marshmallow Ingredients
This recipe has been adapted from Quirky Cooking
2.5 Tbsp organic gelatin (use 20ml Tbsp)
1 cup water
Seeds of 1 vanilla bean
Pinch of salt
2 Tbsp erythritol or natvia (which is a mix of stevia and erythritol) - please note you can use honey to taste, however it will change the flavour and the colour so it won’t be white. Liquid stevia does NOT work in this recipe.
Pink colouring - 1/8th - 1/4 tsp of dehydrated organic beetroot powder
Marshmallow Method (Thermomix Version)
Line 2 containers with unbleached parchment paper.
Add the water into Thermomix bowl, and carefully sprinkle the gelatin powder in making sure it sits on the surface of the water (not on the blades). Let it sit for a couple of minutes to absorb the water, then add the remaining ingredients (except natural colours), and insert the butterfly whisk. Place steamer basket onto lid instead of MC, so steam can escape.
Cook 6 mins/50C/speed 1. Allow mixture to completely cool down in TM bowl until the temperature light doesn’t light up on the TM (make sure the temp is under 37C)
Now mix for 10-12 mins/speed 4. (Keep butterfly whisk attached, and steamer basket on lid instead of MC.) You’ll know when it’s ready because the mixture should be thick and glossy and look a little like beaten egg whites but still airy. If it doesn’t resemble this, I would recommend you keep mixing for another few minutes, or until it reaches the right consistency. If it reaches that consistency before the 12 minutes then stop mixing and move onto the next step.
Transfer 1/2 of the vanilla marshmallow mix to your lined dish and spread it out evenly.
To the other half of the mix, add in your chosen natural colouring. I would recommend the pink one. Start by adding in 1/8th of a tsp of the pink powder and mix the marshmallow again with the butterfly whisk attached on Speed 4 until combined. If you want it ‘pinker’ add a touch more pink powder and mix it through again until it’s evenly combined.
Now transfer the pink marshmallow mix to your second lined dish and spread it out evenly.
Place them both into the fridge to set for at least 1 hour (preferably longer), or until set.
Conventional Marshmallow Method
Line 2 containers with unbleached parchment paper.
Place 1/2 a cup of the water into a medium bowl (or in the bowl of a mixer), and sprinkle the gelatin over the water. Set aside to allow the gelatin to absorb the water.
In a small saucepan, place your sweetener of choice, salt and the remaining 1/2 cup of water. Heat over medium heat, stirring. Using a candy thermometer, bring the mixture to 115C. It will take about 7-8 minutes to reach this temperature. Remove from heat.
Using a hand mixer or stand mixer on low speed, begin mixing the gelatin and water mixture. Very slowly drizzle the hot syrup into the gelatin mixture, drizzling it down the inside of the bowl.
Once it’s all combined, add the vanilla and increase speed to high. Beat for 12 minutes, or until the mixture is thick and fluffy, and peaks like beaten egg whites when mixer attachment is lifted out. (The main reason marshmallows separate or are very dense is because they haven't had enough air whisked into them - so make sure they're well whisked!)
Transfer 1/2 of the vanilla marshmallow mix to your lined dish and spread it out evenly.
To the other half of the mix, add in your chosen natural colouring. I would recommend the pink one. Start by adding in 1/8th of a tsp of the pink powder and mix the marshmallow again with the butterfly whisk attached on Speed 4 until combined. If you want it ‘pinker’ add a touch more pink powder and mix it through again until it’s evenly combined.
Now transfer the pink marshmallow mix to your second lined dish and spread it out evenly.
Place them both into the fridge to set for at least 1 hour (preferably longer), or until set.
Once both marshmallows are set, use kitchen scissors to chop them into squares. Eat ‘as is’ or on top of my Bulletproof Cinnamon Hot Chocolate. Stay tuned for my Rocky Road recipe, it’s coming soon.